
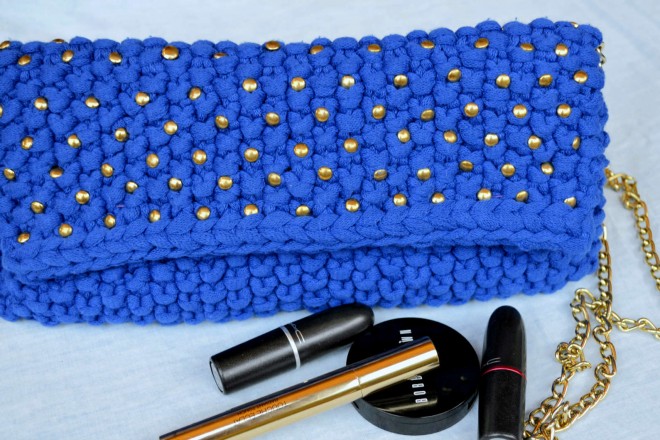
This DIY blue LOVE clutch was inspired by a We Are Knitters (WAK) pattern they were handing out at the Beefeater London Market in Madrid this spring. The pattern was for a mega clutch in WAK’s fabric yarn. The pattern was cool but it wasn’t exactly what I wanted however it did inspire me to make my own clutch. This is my first DIY project on LLK and what started out as just a quick knit turned into something more elaborate but the end result was totally worth it. I don’t know why I have a tendency to overdo it, well actually I do, it’s called perfectionism (my number one frenemy).
My Blue LOVE clutch makes a thoughtful gift for that girl in your life that has everything. Whether it’s for you or for someone else, give this project a try for an exclusive, fun accessory!
You can make this as simple or fancy as you want and it’ll still look amazing. You can literally just knit the piece and finish with steps 1 and 10 and that’s it! Here goes:
MATERIALS
- 2 skeins of Katia Big Ribbon in Klein Blue (colorway 24;1 skein = 200 grs/72 m or 7 oz/77 yds) or your favorite fabric yarn. This pattern uses approximately 250 grs/90 m or 8.8 oz/98 yds) of this fabric yarn.
- 6.5 mm/10.5 US knitting needles (circular or straight)
- Blunt sewing needle for seaming
- Mid-weight interfacing that measures 23.5 cm by 29.5 cm (9.25” by 11.6”); I used black.
- A piece of fabric for the purse lining that measures 26.5 cm by 32.5 cm (10.4” by 12.8”); I used a hot pink fabric.
- Thin iron-on adhesive strip (for hemming the fabric lining) or you can hem the edges on a sewing machine (I just used the adhesive that comes with IKEA curtains).
- Thread to match your fabric purse lining or a contrasting colour if you want it to stand out
- Sewing needle
- 88 small gold circular studs
- 105 cm/1.15 yds of gold link chain for the strap
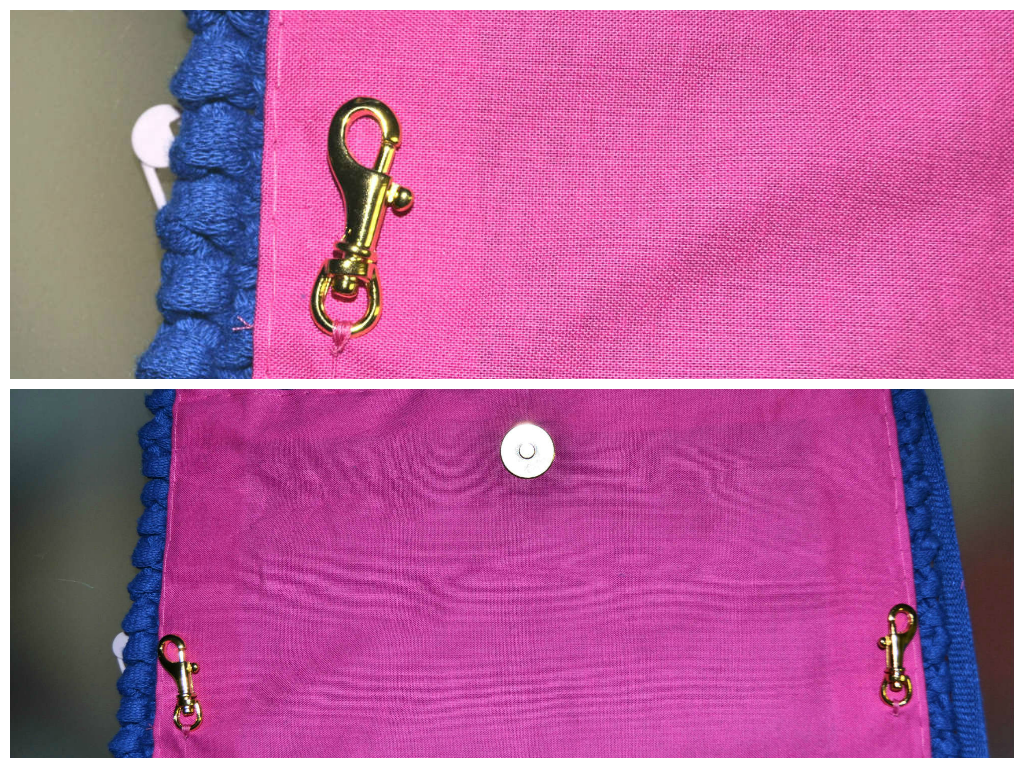
- 2 small gold karabiner hooks
- 1 magnetic purse closure (gold)
ABBREVIATIONS
CO: Cast On
K: Knit
P: Purl
sts: Stitches
BO: Bind off
PATTERN
Gauge: 9.5 sts by 19 rows = 10 cm by 10 cm/ 4” by 4” square in pattern stitch
This is knit quite tightly because you need the clutch to have a certain stiffness and structure to it.
Finished measurements: approximately 28 cm by 14 cm or 8” by 5 ½”
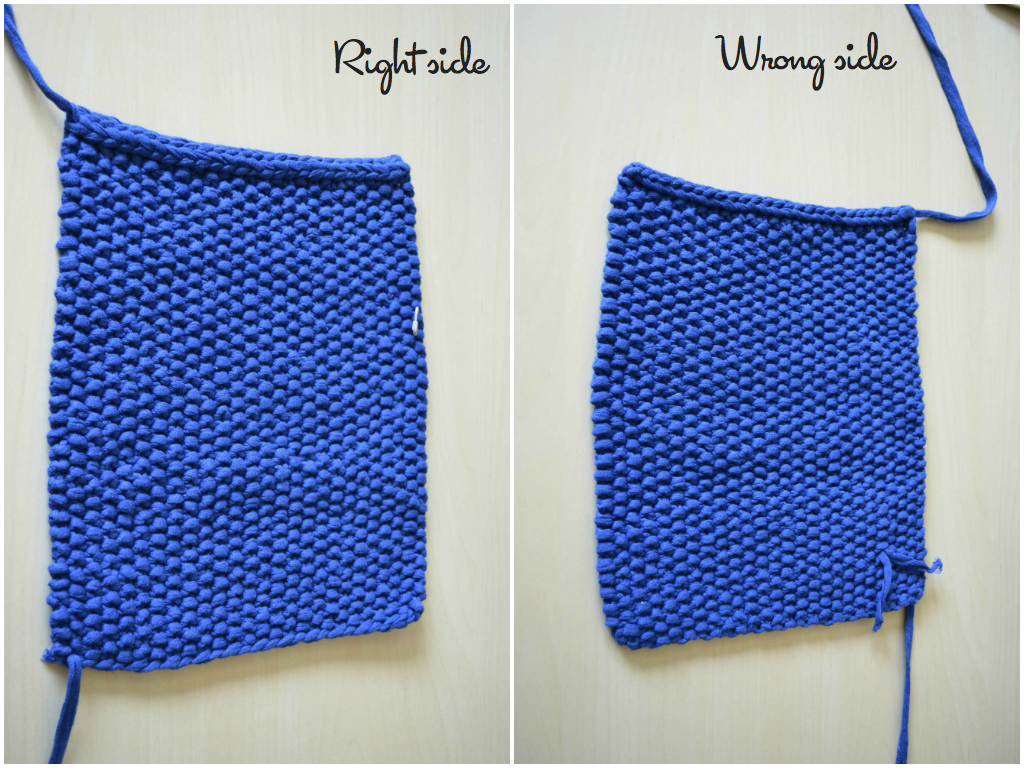
Pattern notes: Row 1*K1P1*, Row 2 *P1K1*
Once you’ve knit the first row, just remember to knit the opposite of the stitch below (i.e. if the stitch below is a knit stitch then you have to purl the next stitch).
INSTRUCTIONS
- CO 26 sts using the long tail cast on. Make sure to leave 50 cm/19 ¾” of extra length on the CO thread because you’ll use this later for seaming the clutch together.
- Row 1: *K1P1*
- Row 2: *P1K1*
- Repeat rows 1 and 2 until the piece measures 34.5 cm/13 ½” from the CO edge.
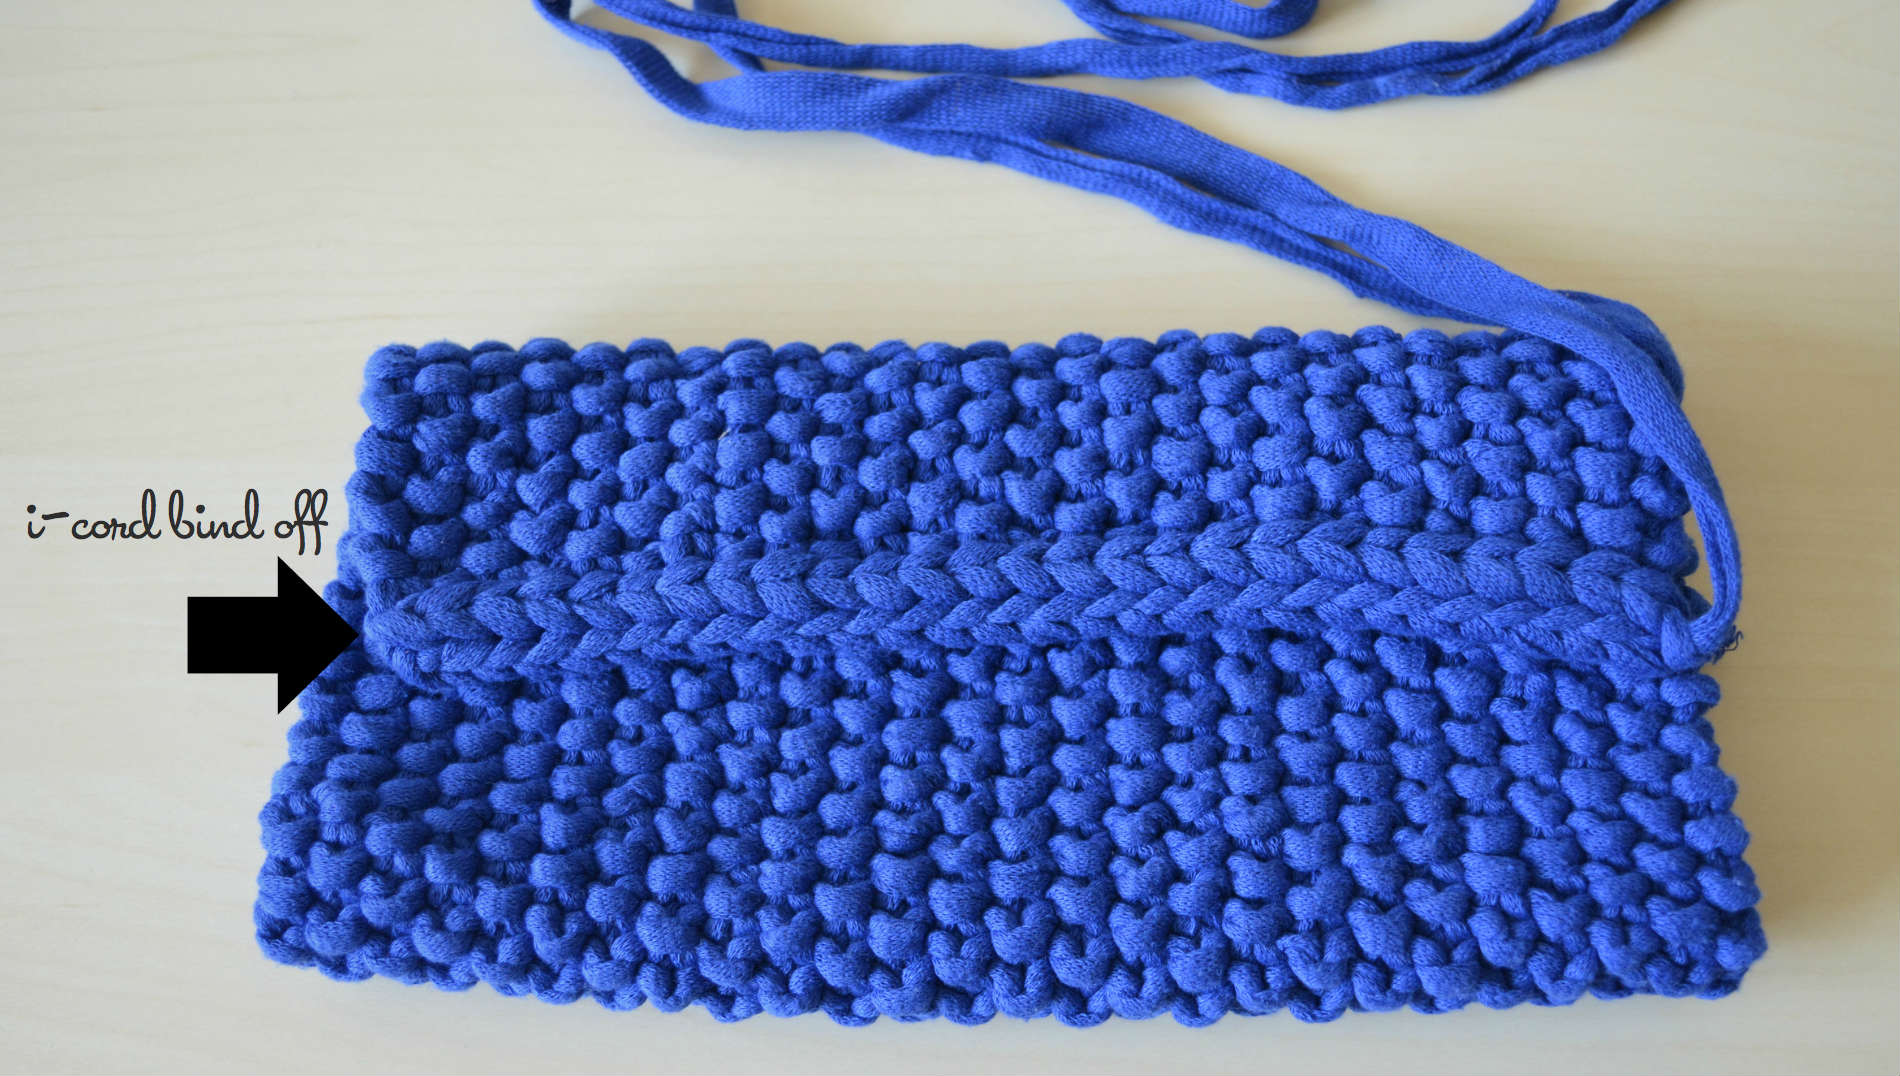
- Loosely BO off all the stitch using the I-Cord BO method. The I-Cord BO makes a nice rolled edge which is perfect for this clutch. This rolled edge will be the front of your clutch.
FINISHING
***Make sure you read through all the steps before starting the finishing.***
1) Weave in the ends so that they are on what will be the inside of your clutch. Make sure you don’t weave in the long piece left over from your CO because you’ll need this for seaming your clutch together. If your ends are too short to use a blunt sewing needle, use a crochet hook to weave in the ends.

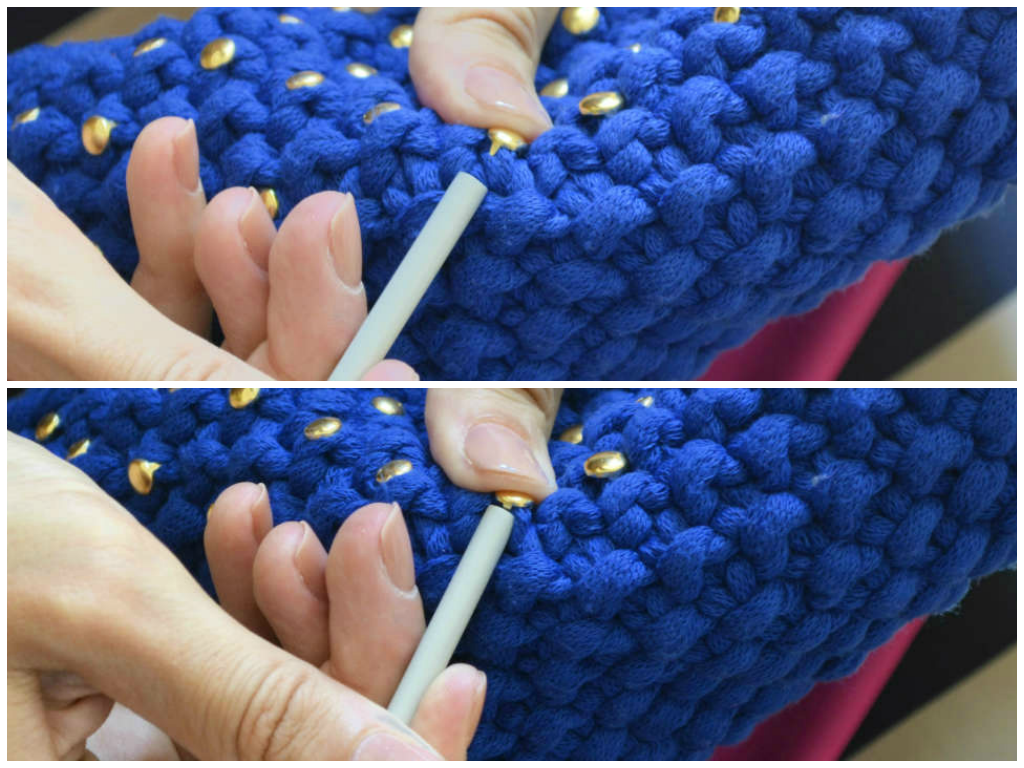
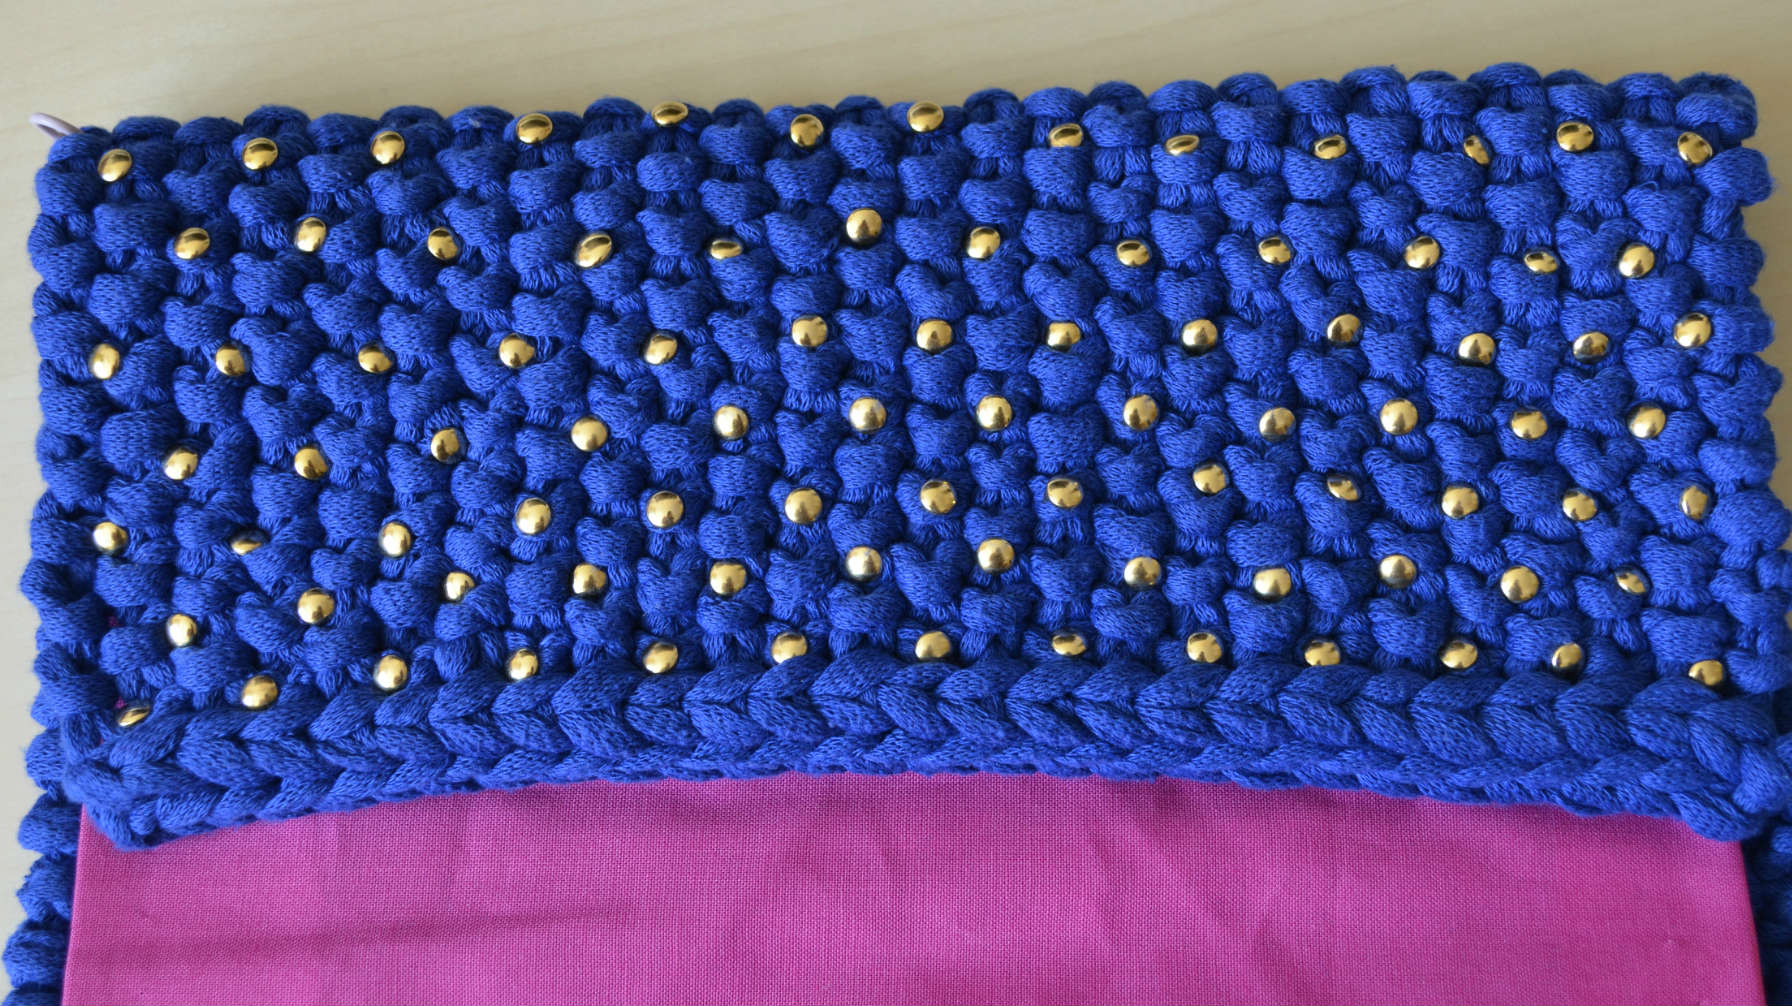
2) Place your studs on the right side of the knitted piece. It takes some practice to secure the studs properly on this thick fabric but you’ll totally get the hang of it. I used the flat-bottomed edge of a metal crochet hook. Make sure you secure all the prongs on each stud. This is the most tedious part of this DIY but it’s also what gives it a special something so don’t get discouraged cause you’ll totally love the finished result. I put the studs on just before seaming the clutch (that’s why you see the lining in the pics) but it’s way smarter to do it now because it’ll be easier to secure the studs at this point in the project. Don’t like studs then add sequins or embroider an Aztec type design; whatever floats your boat!
3) Cut your interfacing so that there is about a one-centimetre edge between the knit piece and the interfacing. I used interfacing because I wanted to give the clutch extra stiffness but it’s not necessary.
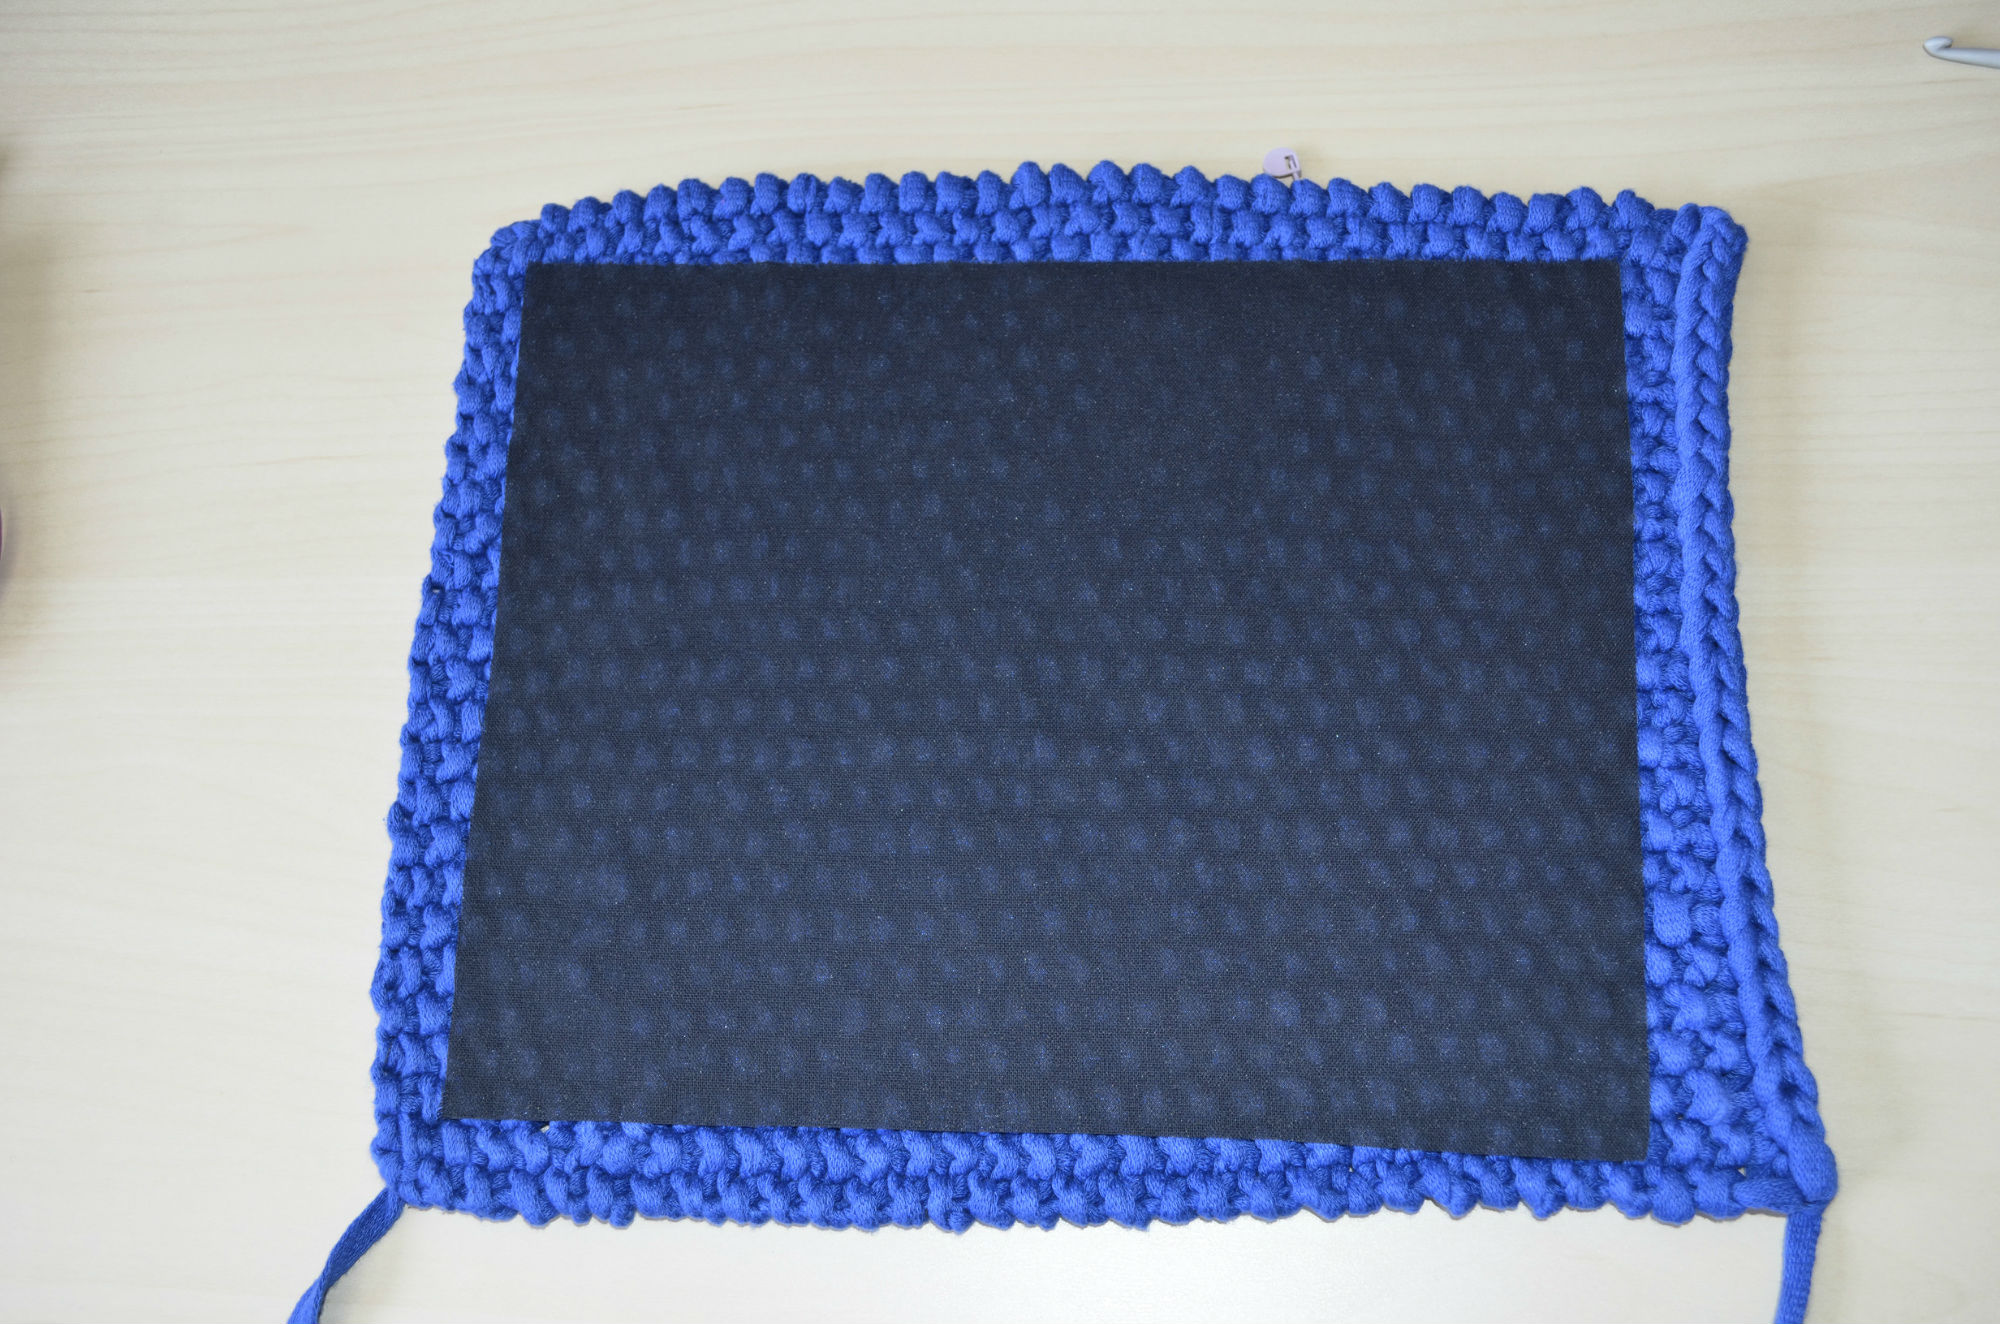
4) Iron on your interfacing (follow manufacturer’s instructions) onto what will be the inside of your clutch (that’s the wrong side, the side where you weaved in your ends). Set this aside for a bit until it cools.
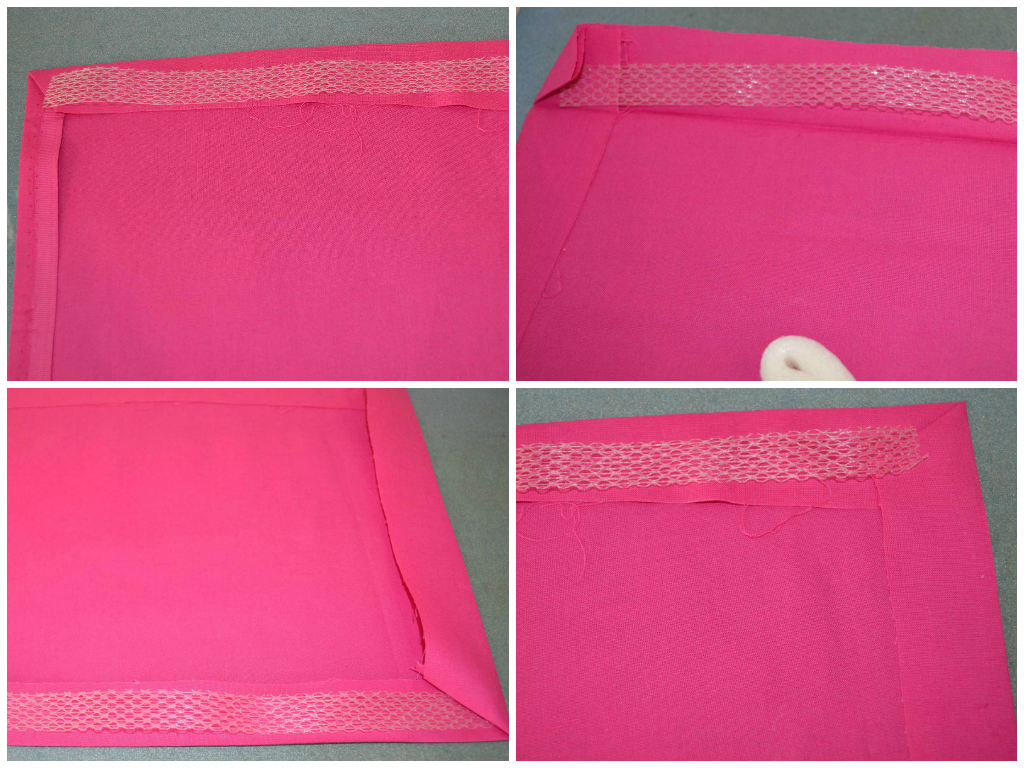
5) Cut your fabric lining making sure to take into account that you’ll need about a 2-3 cm/1” overhang on the rectangle’s edges so that you can hem them properly.
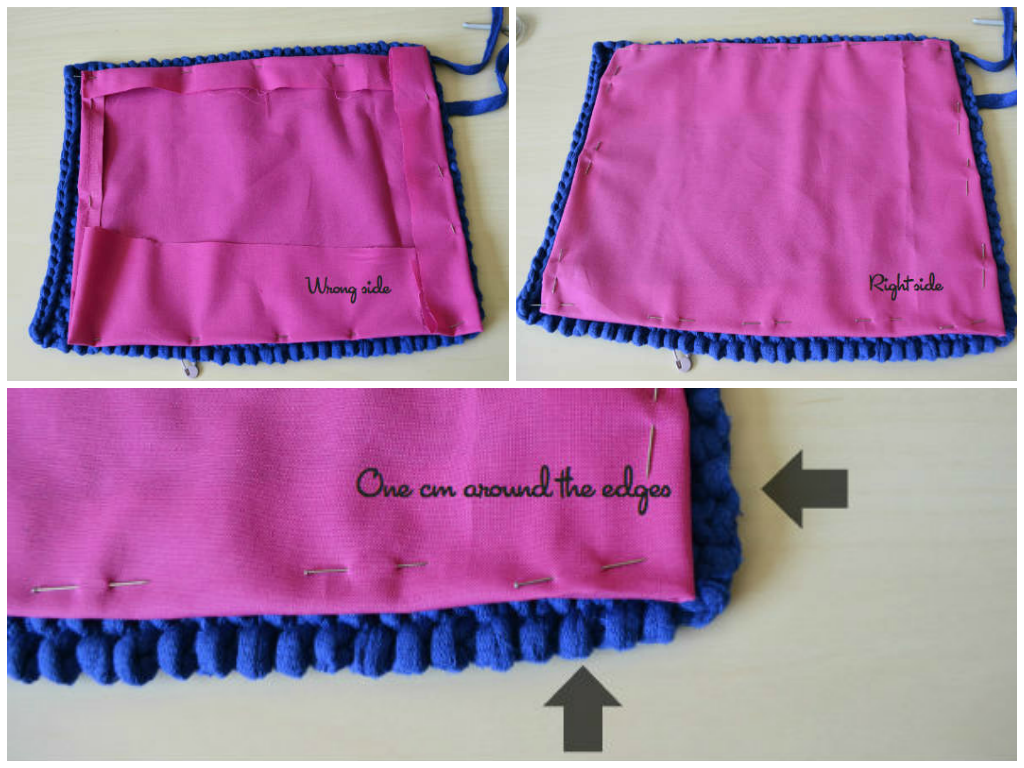
6) Iron down the hemmed edges before using the iron on adhesive strip. Don’t skip this step because it makes it way easier to iron on the adhesive and this way you’ll also avoid getting crooked edges.
7) Now you have to place the two pieces that make up the magnetic closure onto the clutch. You have to do this step before sewing the lining to your purse. I found it was easiest to pin the fabric lining to the knitted piece in order to see where the closure would fit best and I also folded the clutch and snapped the closure shut to mark the right spot for it.
7a) I placed the top piece of the closure in the middle of the pink fabric and about 1.5 cm/¾” from the top horizontal edge of the pink fabric (this will be on the top inside part of your clutch when you open it).
7b) I placed the bottom piece of the closure in the middle of the right side of the knitted piece about 3 cm/1¼” from the bottom horizontal edge of the knitted piece.
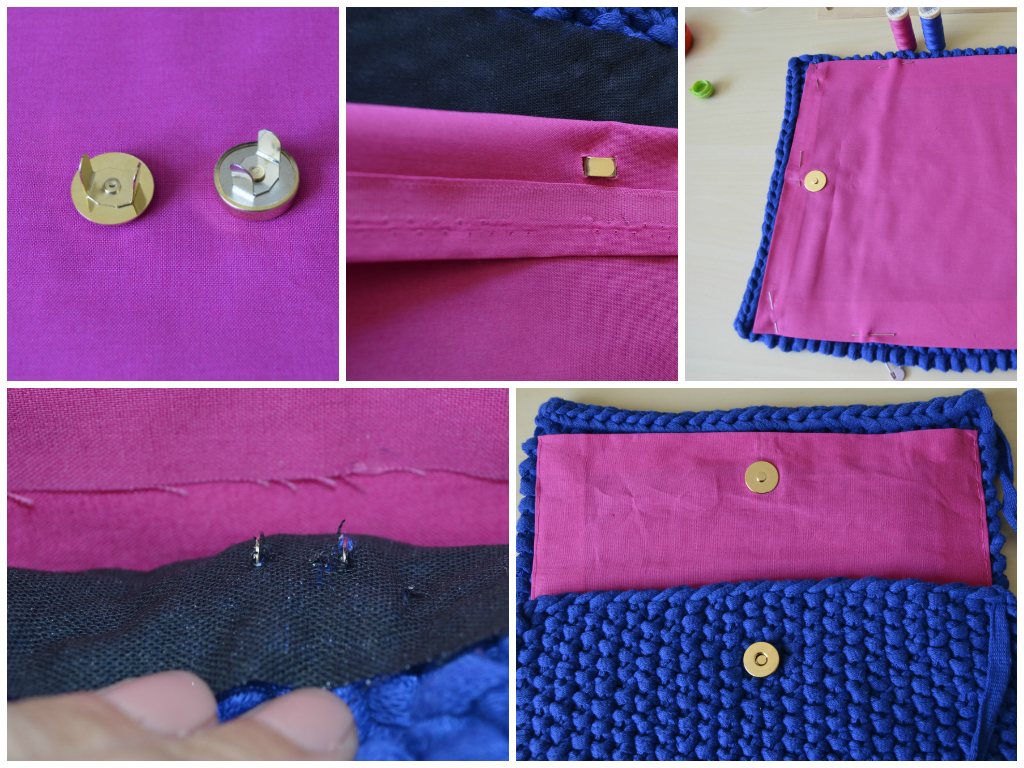
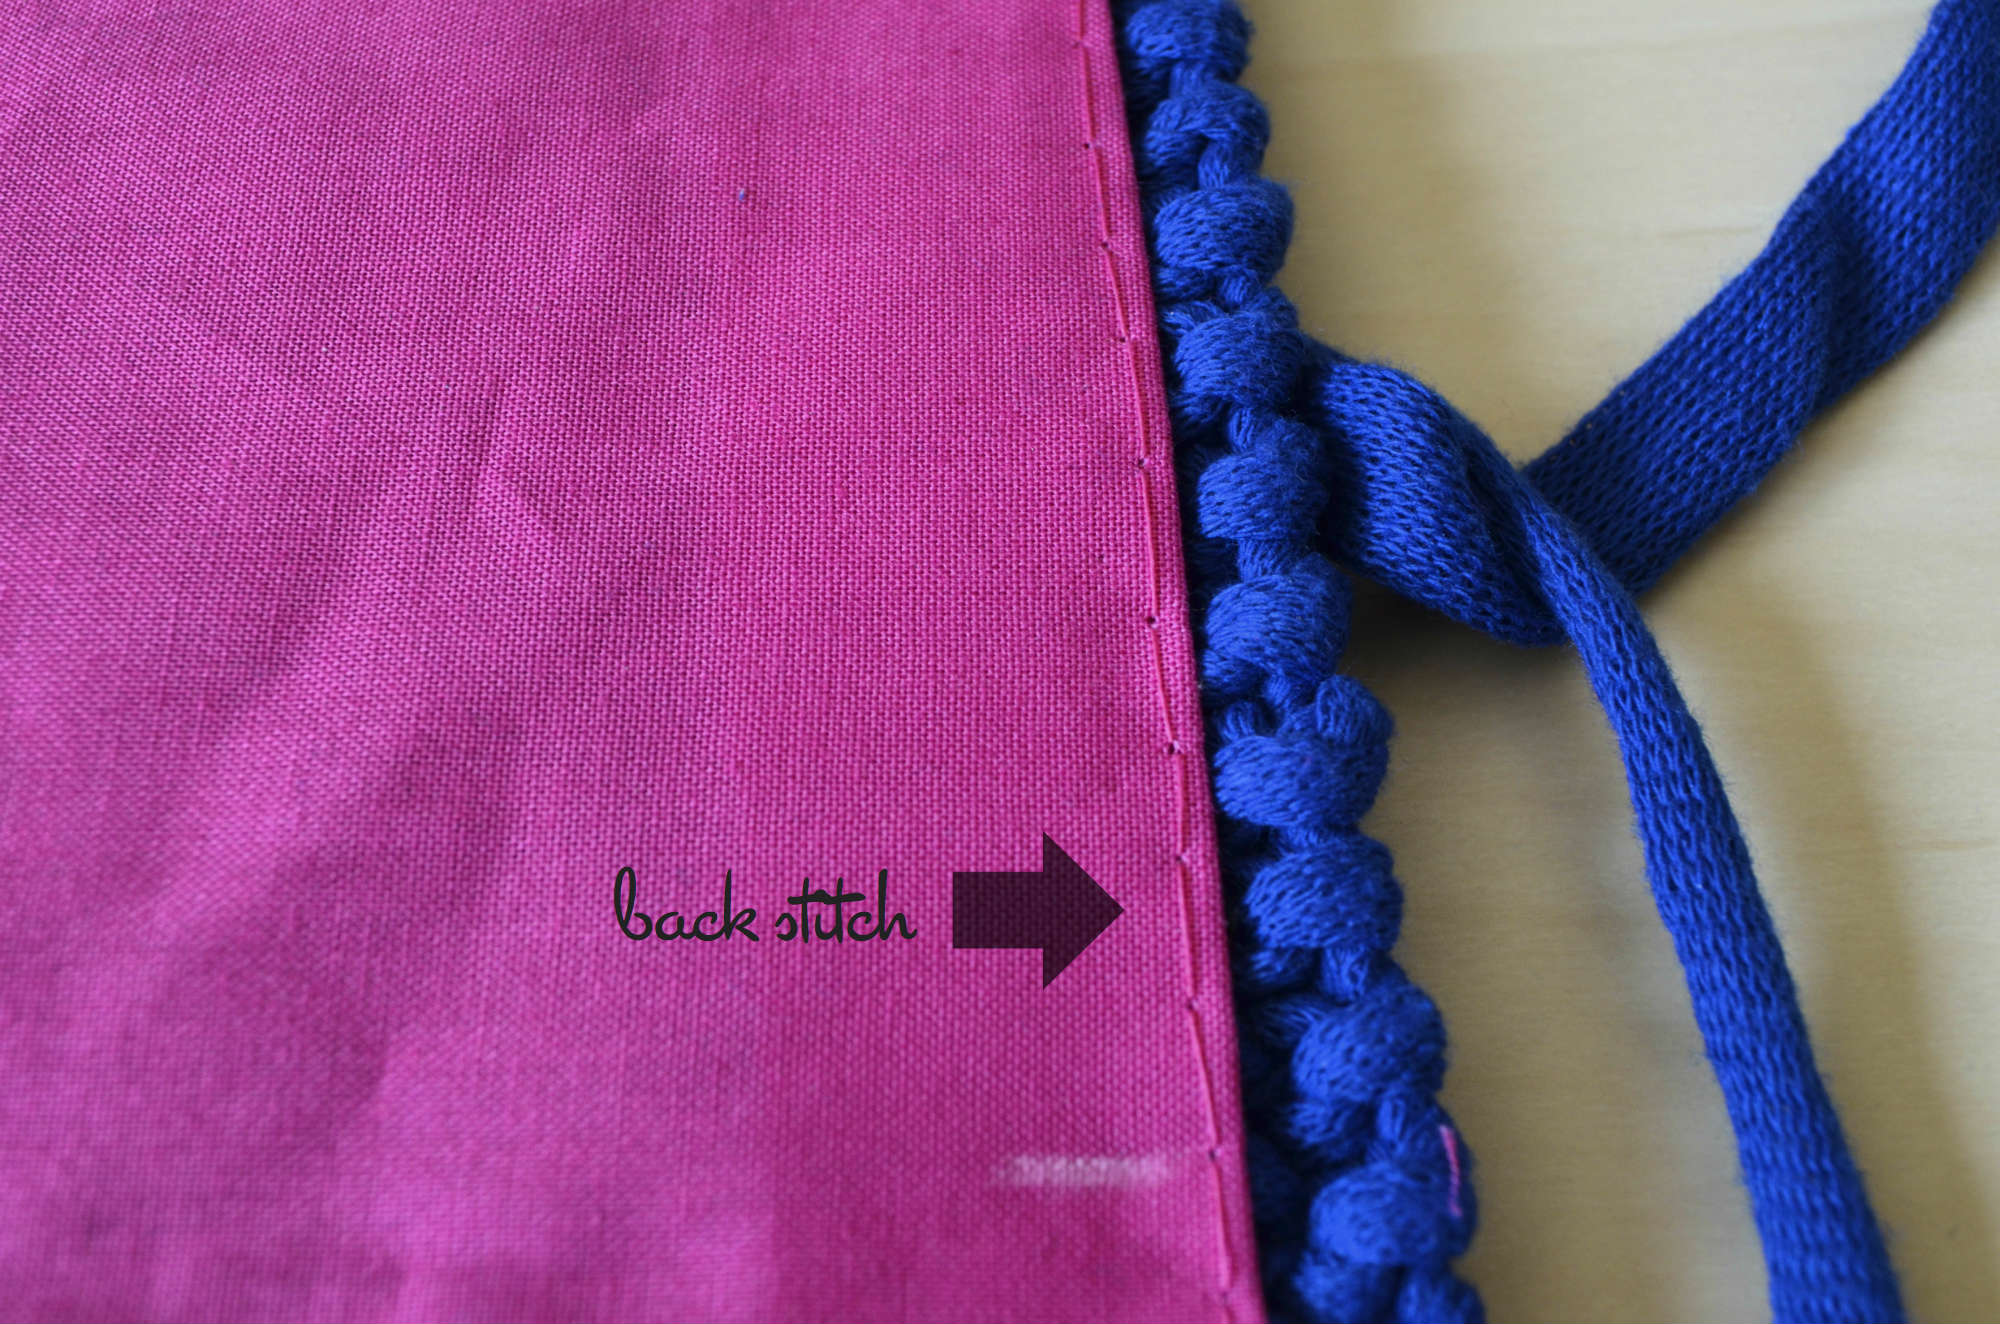
8) Hand-sew the pink fabric to the inside of the knitted piece (the wrong side). I used the back stitch technique to sew these two pieces together. I’m not a sewer by any means and I usually hate sewing but I thought this gave the clutch an added detail to it. If you’re really anti-hand sewing then just use some iron on adhesive to join these two pieces together but make sure to iron it well so that your lining doesn’t start to pull away from the clutch.
9) Sew the karabiner hooks to the pink lining. I positioned the hooks about 12 cm/4¾” from the top horizontal edges of the pink lining and about 1 cm/½” from the vertical edges of the pink lining. You can skip this step if you don’t want a strap on your clutch.
10) Seam the clutch by folding the bottom edge upwards (this fold measures about 11.5 cm/4½” once folded) and sew the vertical edges. Make sure to pull tight when seaming so that the seaming is invisible.

11) Weave in your ends and add your chain link strap.
12) Plan a night out so you can showcase this awesome piece of DIYing.

Resources
Long tail cast on video at https://www.youtube.com/watch?v=VJEg1LE6gVQ
I-cord bind off video at https://www.youtube.com/watch?v=GyhgyvEgsBM
Hand sewn back stich video at https://www.youtube.com/watch?v=0G8aI7HVAY4
Make sure to show-off your versions of Blue LOVE clutch on Instagram by hashtagging #blueloveclutch and tag @laughlovekissblog. I can’t wait to see your beautiful pieces!


Pingback: 8 accessoires tendances à faire soi-même pour cet été
Pingback: 8 accessoires tendances à faire soi-même pour cet été
I love this bag…it’s gorgeous…can I have one for Christmas please ;oP xoxo
That is one amazing clutch and I love the color!
We are knitters have great patterns and you did a fabulous job!
Clutch away!!!
Thanks! You should see it in person, it’s really cute. Unfortunately my photographing skills don’t do it justice (just yet).